HOLDING AND MOVING THE NOTER - BEGINNER
HOLDING AND MOVING THE NOTER - BEGINNER
by Robin Clark
The purpose of this lesson page is to help beginners get started with noter and drone playing. Here we look at noters, how to hold them and how to move them.
Noters
There are way too many noter shapes and materials to mention them all here so we'll stick with the most prevalent type supplied with new dulcimers, the 1/4" round hardwood dowel. I have to say that the 1/4" round hardwood dowel is a personal favourite of mine. I buy 6' lengths of hardwood dowel from our local hardware store for around $5 and that will give me 24 x 3 noters!!! The material a noter is made of makes a big difference to the tone you will get when playing. Personally, I like my noters just a little 'soft' (ie maple rather than ebony) as I don't want the noter to sound like I'm playing slide guitar. I want the notes to sound on the frets not on the noter between the frets. You can try this yourself by taking something hard and shiny like a small glass medicine bottle and sliding it up and down the melody string without pressing the string all the way to the frets it will sound like a Hawaiian guitar. I look for noter materials that give a very dull thud when doing this exercise, not a clear ringing slide sound. That way I can get more clarity in my playing and when playing noter & drone clarity is important or all your notes will tend to run together.
The two noters in this picture are a 3 long 1/4 round dowel and the end of a goose quill (another nice sounding lightweight noter, referred to in many old texts about dulcimers). You can see plenty of wear marks on the noter ends noters don't last that long but you can lightly sand a hardwood dowel to restore the surface a couple of times before it reaches the end of its life.
There is a great thread on all different types of noter that FOTMD folks use here:
Holding the Noter
I'm going to show two techniques for holding the noter there are more but these two are 'guided' grips and so they are quite precise. By the term 'guided grip' I mean that your right hand fingers, as well as holding the noter, make a guide against the side of the fretboard sort of like using a set square to get a 90 deg angle when drawing.
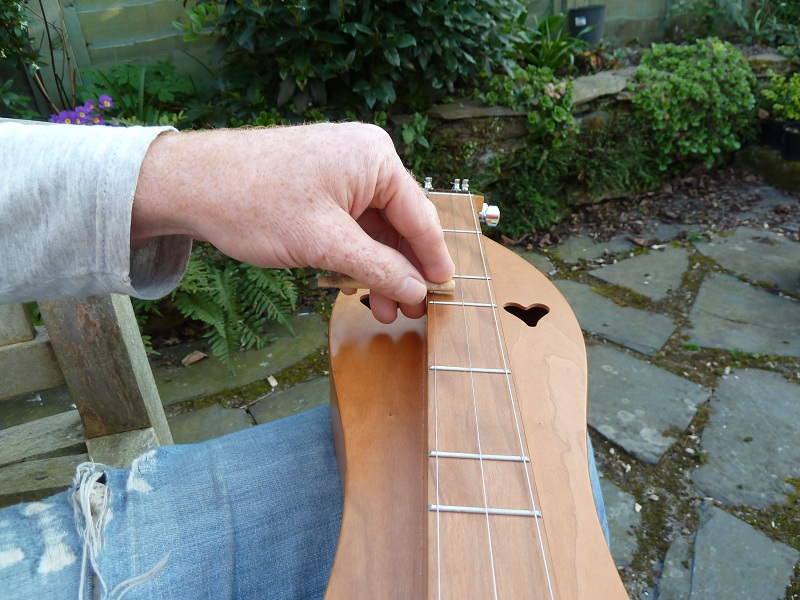
The Finger-on-Top Grip This noter grip will work on shallow fretboards and Galax set-ups (4 x equidistant strings). It is also used by many players as their sole or preferred noter grip. It is a little less natural to use from a standing position than the thumb-on-top grip but where the elbow of the noter hand can remain low (most seated situations) it is a very relaxed grip. Wrist movement is a little more restricted with this grip so you may want your dulcimer at more of an angle across your legs (headstock over the right knee, tail on the upper thigh) than is the case with the thumb-on-top grip. Here is a photo of the finger-on-top noter grip:
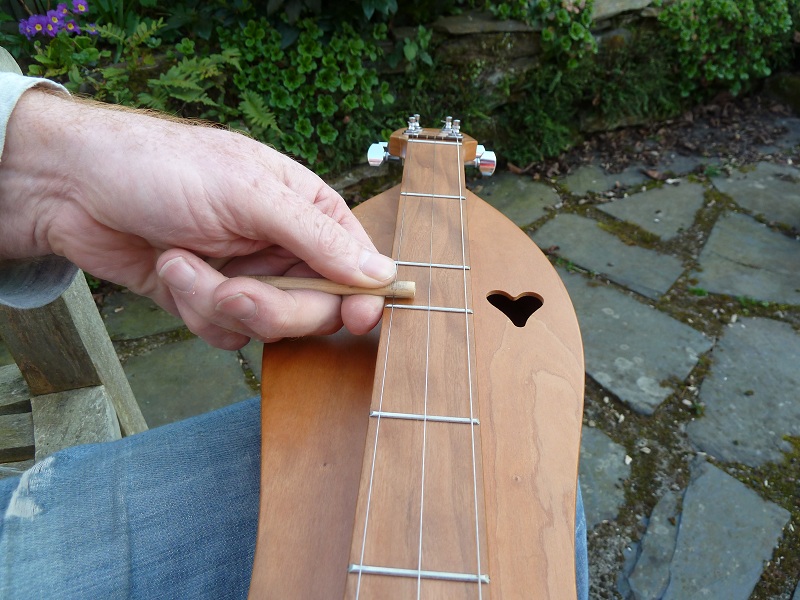
Thumb-on-Top Grip This grip will only work on high fretboards because you need
enough clearance for you whole hand between the noter and the top surface of the dulcimer. This is a very relaxed grip and it frees up your wrist for small fast movements such as grace notes. It will work OK with a high elbow and so is the preferred grip when standing to play. You will have good access to the higher sections of the fretboard when using this grip. The dulcimer can also sit straighter across your lap, rather than at an angle. Here is a photo of the thumb-on-top grip:
How Tight should I Hold? - Keep your grip as light as possible. Practice holding the noter with a lighter and lighter grip until you loose all control or drop the noter then just work on holding the noter right on the edge of dropping it! If you hand is relaxed, your wrist will be relaxed; if your wrist is relaxed, your arm will be relaxed; if your arm is relaxed, your shoulder will be relaxed. The result is that your playing will be more fluid and more in time!!! Accurate timing starts with a relaxed noter grip!
How much Down Pressure? Lighter that you think. Just enough to sound the note cleanly on the frets. Again, practice going too light so you know how little pressure you can get away with.
Keep it Level One of the advantages of using a guided grip is that it becomes a little easier to keep the noter parallel to the fretboard. If the tail of the noter is to high then the nose will bump against the frets, if the tail of the noter is too low then the middle of the noter will bump against the outer edge of the frets.
To Slide or To Lift? - You have two option when moving the noter from fret to fret; you can slide the noter or you can lift the noter. In general, you will be sliding the noter as this is all part of the noter & drone playing sound. However, if you watch and listen to any noter drone player you may also notice that they lift the noter to make certain note jumps too! It is very subtle and the lift may be no more than a fraction of an inch, just enough NOT to sound the frets between one note and another. It is certainly worth practising both sliding between notes and lifting between notes. The difference this makes within a tune is subtle, but using both techniques allows you to place emphasis where you want and really make a tune your own. I have added a sound clip below where I play 'Aunt Rhody' through 4 times. The first and third times I just use slides; the second and fourth times I use slides and lifts. See if you can hear the difference?
Aunt%20Rhody%20-%20Slides%20and%20Lifts%20-%2031%20Mar%2012.mp3
For further information on noter holding there is an FOTMD thread here:
http://fotmd.com/forums/forum/traditional-style-playing-drone-and-or-noter-discussions/2948/thumb-or-index-finger-to-press-noter#r2952
Also Strumelia's Noter & Drone blog has information and a video showing other grips: Beginner tips on using a noter.