Strumelia
Strumelia
@strumelia
9 months ago
2,319 posts

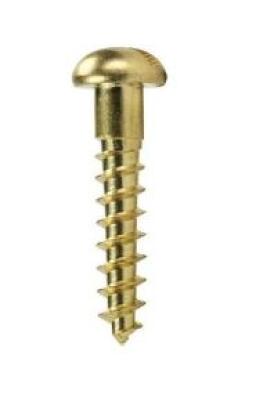
In the photo, you can see how if you stacked two ball-ends on that screw, there is left almost NO threads to actually hold the screw in the wood. You'd wind up screwing as much as possible and stripping the wood threads. Plus, then the lower ball-end ends up digging into the wood. Not a good arrangement at all. Loop end strings just slip right over whatever pin or screw is there... no screwing/unscrewing involved.


--
Site Owner

Those irritated by grain of sand best avoid beach.
-Strumelia proverb c.1990
Nate
Nate
@nate
9 months ago
341 posts

Dusty Turtle:

I think the reason Richard suggested using loop end strings was not to save time, but to minimize the possibility that the wood might degrade and lose the grip on the screw. If you never have to unscrew the screw, the wood would be more likely to stay intact.


It seems to me that the screw pulled out because it was way too short. If you use a 3/4" long screw, even if the wood eventually does degrade, the screw will just sit in it like a pin. Because the first screw is so shallow, I would think a more appropriate length screw would make threads below the area that tore out. A drop of candle wax or some graphite shaved off a pencil lead can be dropped into the screw holes to relieve the friction when screwing and unscrewing, and preserve the grooves that the screw fits into.

Dusty Turtle:

you can also make a loop end string out of a ball end string by removing the ball. Just squeeze it with some plyers and pry it out.

 
I will have to try that. That is a total game changer for me, thanks for the tip Dusty. I try to buy anything I can from my local music store, since it's the only one in town that was able to stay open through the pandemic. I didn't know it was that easy to take the ball out of the loop on strings, and I think that will come in handy a lot with all the guitar strings I have.

Dusty Turtle
Dusty Turtle
@dusty
9 months ago
1,766 posts

Nate, I think the reason Richard suggested using loop end strings was not to save time, but to minimize the possibility that the wood might degrade and lose the grip on the screw.  If you never have to unscrew the screw, the wood would be more likely to stay intact.  In the picture MJ posted, the screw hole looks like it has to be filled.

I've never had trouble finding loop end strings of any gauge.  JustStrings sells them in bulk, plain steel from .008 to .018 and wound from .020 to .040.  For the odd string or two I just go to my local music store.  And you can also make a loop end string out of a ball end string by removing the ball. Just squeeze it with some plyers and pry it out.


--
Dusty T., Northern California
Site Moderator

As a musician, you have to keep one foot back in the past and one foot forward into the future.
-- Dizzy Gillespie
Nate
Nate
@nate
9 months ago
341 posts

When I am using wood screws for ball end strings, I will usually use this type
Capture.JPG
So that the screw is nice and secure

Nate
Nate
@nate
9 months ago
341 posts

In my experience, loop end strings for dulcimers tend to be in very particular light gauges that aren't ideal for much tension in DAD tuning with shorter VSLs. I prefer much thicker gauge strings, which usually means buying guitar strings, either individually, or just a set that includes the gauges i want.
Personally, I use screws as well as ball end strings on a lot of my dulcimers and don't find that it adds much time at all to replacing strings, less than a minute of screwing and unscrewing total. I would say that pins or headless nails look much nicer though.

Dusty Turtle
Dusty Turtle
@dusty
9 months ago
1,766 posts

Richard Streib: An additional solution may be to use loop end strings so more of the threads engage the wood. Using loop ends will not require removing the screw to change strings. It looks like the screw hole may need to be filled and start over with a slightly longer screw.
 

I second Richard's suggestion. Once a new and longer screw is in, use loop-end strings.


--
Dusty T., Northern California
Site Moderator

As a musician, you have to keep one foot back in the past and one foot forward into the future.
-- Dizzy Gillespie
Richard Streib
Richard Streib
@richard-streib
9 months ago
250 posts

An additional solution may be to use loop end strings so more of the threads engage the wood. Using loop ends will not require removing the screw to change strings. It looks like the screw hole may need to be filled and start over with a slightly longer screw.

Nate
Nate
@nate
9 months ago
341 posts

Those screws look pretty short, I'd say replace them all with longer ones. Putting two strings on one screw or nail seems like a lot of stress, even if it were a longer one. Since the two ball ends are stacked, the 'top' one will be applying a lot of leverage. It looks like there is a small crack running from the screw hole already, but maybe that's just a surface scratch. If the instrument will be 4 string in the future, consider drilling a 4th hole next to the melody string anchor and replacing all 4 with longer screws or finishing nails.


updated by @nate: 04/28/24 07:38:29PM
John C. Knopf
John C. Knopf
@john-c-knopf
9 months ago
421 posts

MJ, the owner could buy a longer screw of the same type and put the string end (ball) through that.  It seems like an unusual design to have to unscrew the pin every time you need to change a string.  I would replace all 3 pins with headless nails that the string balls could just slip over, thus making changing strings faster and easier.

MJ
MJ
@mj
9 months ago
3 posts

. A member of my embroyic duclimer group recently purchased a second hand dulcimer.  It looks and sounds great  but when she was tuning it  one of the anchor pegs pulled out ( I have posted a picture).  One problem is that it was holding two strings and she is happy to revert to a three stringed instrument.  It looks like a relatively easy fix to me but I don't want to make it worse and I;m not a luthier and there do not seem to be many people on cape cod who even know what a dulcimer is, let alone how to safely replace the anchor.

IMG_4686.jpg
IMG_4686.jpg  •  277KB